Database Designer
<< Blob Viewer / Editor | IBExpert | Test Data Generator >>
 tutorial available
The IBExpert Database Designer is a comprehensive tool, which allows database objects to be managed visually. It can be used to represent an existing database optically, or create a new database model, and then create a new database, based upon this model. It is possible to add, edit and drop tables and views, edit table fields, set links between tables, edit and drop procedures, and so on. This feature is unfortunately not included in the free IBExpert Personal Edition?.
The IBExpert Database Designer offers full support of UTF8. Internal representation of string values has been changed from ANSI to UTF8 (except exceptions' texts which are stored AS IS according to their character set in Firebird/InterBase® databases - OCTETS). Conversion of existing model files will be performed automatically the first time they are opened.
The Database Designer can be started from the IBExpert Tools menu.
The Designer Menu offers the following options:
- Reverse Engineer ...
- Generate Script...
- New Diagram
- Load Diagram from File
- Save Diagram
- Export...
- Manage Subject Areas
- Manage Subject Layers
- Model Options...
There are also a number of toolbars (please refer to Database Designer toolbars for further information). Should IBExpert not load the toolbars automatically after starting the Database Designer, delete IBExpert.tb from the \Documents and Settings\<user>\Application Data\HK-Software\IBExpert\ directory and restart IBExpert.
Using the Designer menu items or icons, an existing diagram can be opened from file, or a new diagram created.
Reverse Engineering will be used here for the sake of demonstration.
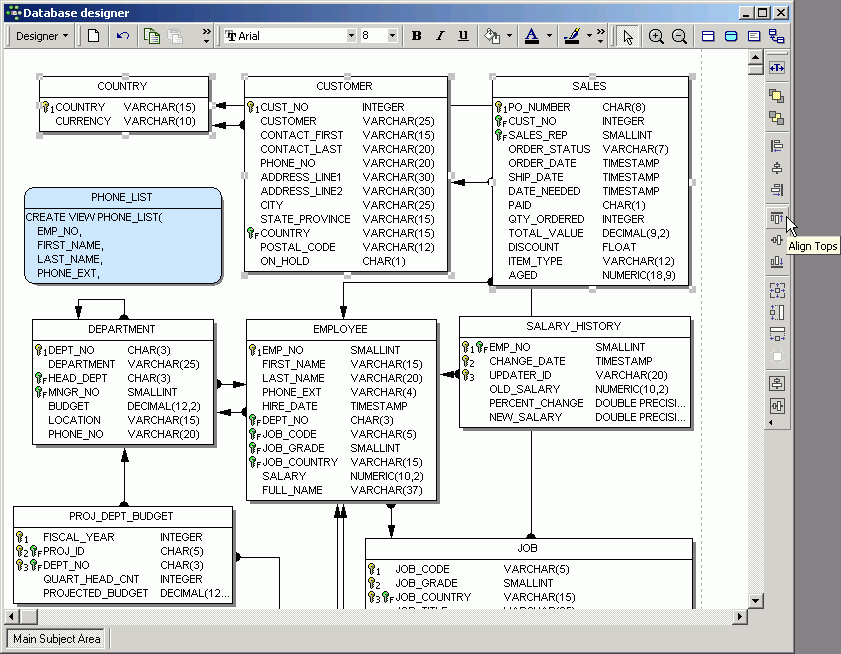
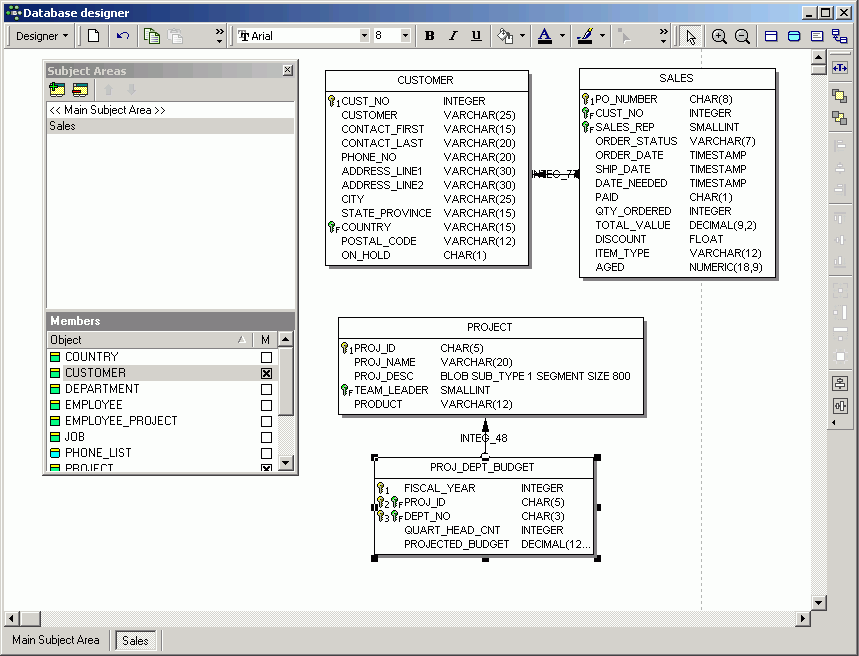
By simply creating a model of the sample EMPLOYEE database using the Reverse Engineer ... menu item, it is possible to view and test the many features the Database Designer has to offer.
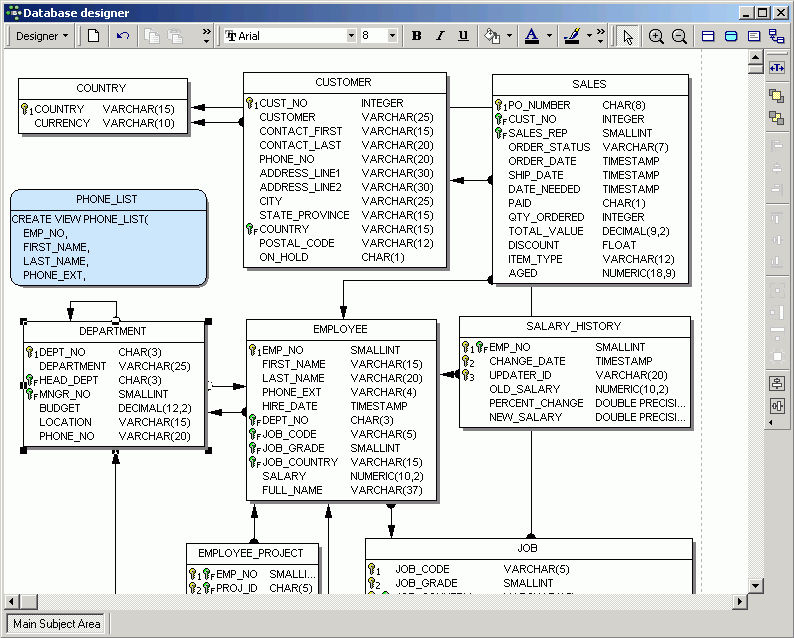
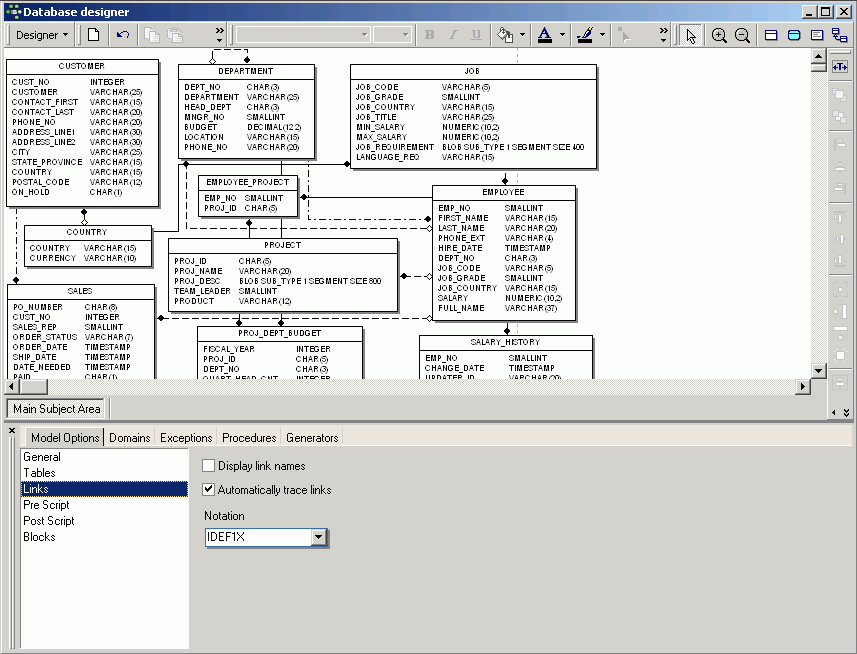
The above illustration displays the sample EMPLOYEE.FDB database, not including any system tables, and with the Model Options Links option, Automatically trace links switched on and a number of display options found under Model Options Table activated. The magnifying glass icons in the Menu and Palette toolbar can be used to increase or reduce the diagram size. Using the pointer icon (=normal editing mode), tables and views can be selected by clicking on them with the mouse, or dragged 'n' dropped as wished; the connecting lines (=links) automatically move as well. You can use [Ctrl] + double click on a table or view to open the Table/View Editor for the corresponding table/view in the active database.
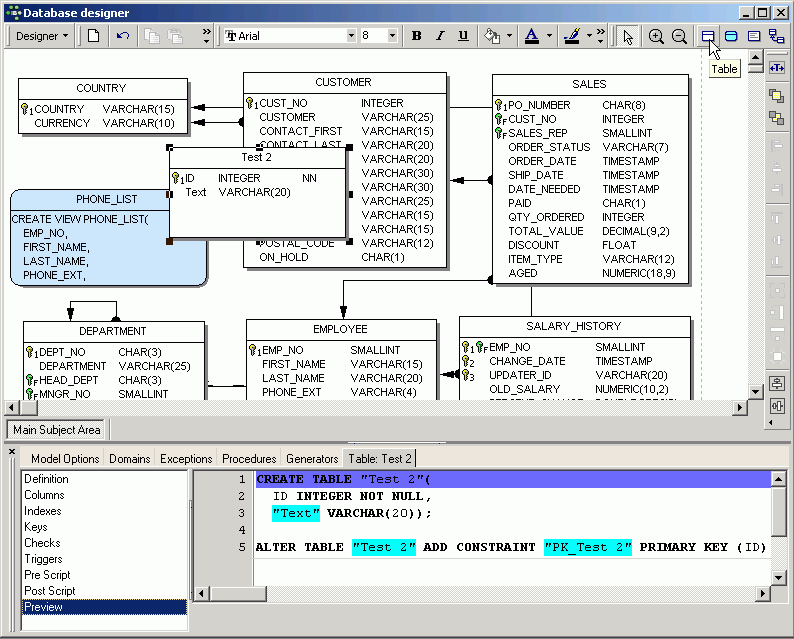
Insert new tables or views by simply clicking on the relevant icon in the Palette toolbar, and positioning in the main diagram area.
Templates can be used (IBExpert menu item Environment Options / Templates) to create foreign and constraint names automatically. It is also possible to customize the highlighting of variables. Use Options / Editor Options / Color to choose color and font style for variables. Custom colors are saved in and restored from a grc file.
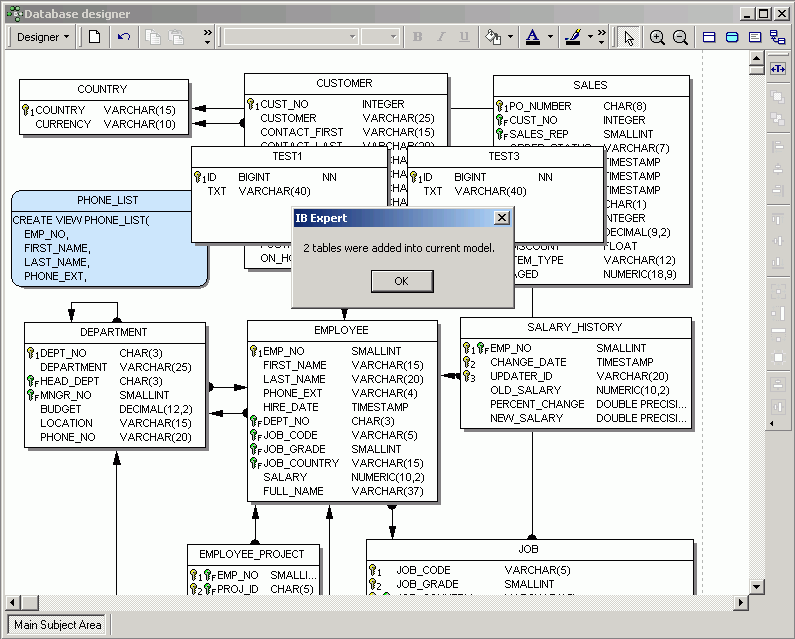
Alternatively, existing objects may be dragged and dropped from the DB Explorer (also from the Project View tree) and SQL Assistant into the main editing area. After dropping tables dragged from the Database Explorer, possible references (foreign keys) will be analyzed and added into the database diagram following confirmation.
The Model Navigator in the SQL Assistant enables you to navigate models quickly. The Database Explorer offers an additional Diagrams page, displaying all objects in the database model in a tree form. Simply click on any object, and it is automatically marked for editing in the main Database Designer window.
The Comment box icon allows comments to be added to the diagram. Insert and position a comment box, double-click to add the comment text in the Model Options window on the Database Designer Comment Box page.
Reference lines, i.e. foreign key relationships can be drawn between tables/views using the right-hand icon in the Menu and Palette toolbar, and dragging the mouse from one table to the next.
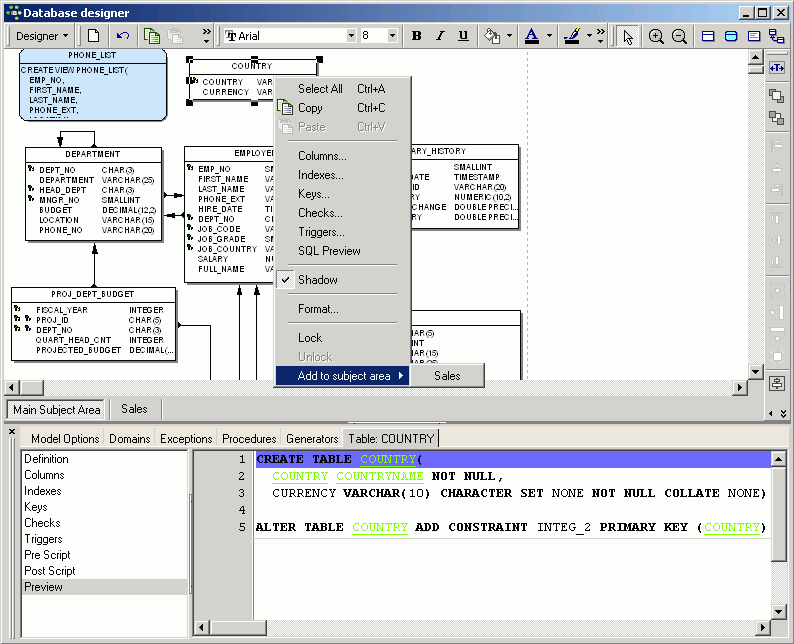
Context-sensitive right-click menus offer a number of options for selected tables, views or links (please refer to Database Designer right-click menus for further information).
Double clicking on any table or view opens the Model Options menu item in the lower window, where information can be viewed, altered or specified.
By double-clicking on the line between two tables, the relationships are shown in detail. The name and automatic tracing of links are options, as already mentioned, included in Model Options.
Database objects may be grouped using the [Shift] key and selecting objects with the mouse, and then using the respective Layout toolbar icons to group or ungroup objects. Objects can also be aligned (left, center, right, top, middle, bottom), again by holding the [Shift] key and selecting objects with the mouse, and using the respective Layout icons.
Don't forget, the white pointer icon returns the mouse to the normal editing mode!
It is also possible to Manage Subject Areas and Manage Subject Layers.
When the database model has been designed/altered as wished, a script can be generated (please refer to Generate Script) and executed, to apply these alterations to the database itself.
Database Designer right-click menus
The main Database Designer design area offers a selection of context-sensitive right-click menus. When a table is selected, the following options are offered:
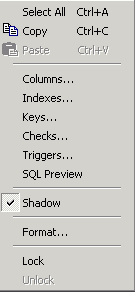
These include options to Select All, Copy and Paste. Columns, Indexes, Keys, Checks, Triggers and SQL Preview are those options also offered in the Model Options window in the lower part of the screen; a check box to specify whether a selected table should be depicted with a shadow or not; and the Format menu item opens a new dialog - for tables however, this only offers the visual shadow option, also listed as a check option in the menu.
The Lock / Unlock option allows visual objects to be locked, to protect them against casual modification of size and position.
When a view is selected, the right-click menu offers the following options:
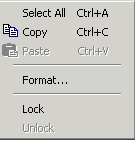
Again the option to Select All, Copy and Paste is offered, along with the Format option. This dialog must be opened and the shadow option checked or unchecked, if the appearance of the view is to be altered.
When a link is selected, the following options are offered:
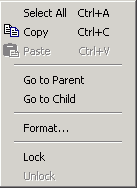
Again there is the option to Select All, Copy and Paste. Furthermore, it is possible to spring to either the Parent or Child (i.e. primary key table or foreign key table), and again the Format option opens a new dialog, where, on the Links page, the rounded corners option may be checked or unchecked as wished.
Reverse Engineer
Reverse engineering creates a diagram of an existing database.
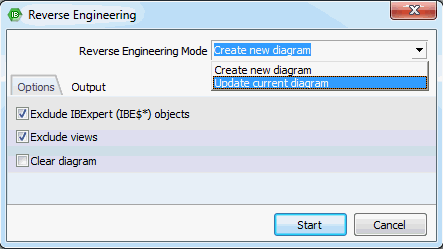
When reverse engineering, select the database to be visually displayed from the list of registered databases.
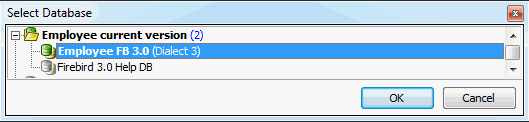
In the case of the selection of an unconnected database, IBExpert asks whether it should connect. Specify whether a new diagram should be created (checking the Clear Diagram option if necessary) or an existing one updated:
Start the reverse engineering, and see how quickly IBExpert creates a diagram of the database!
Generate Script
It is also possible to generate a script for the model using the Generate Script menu item. This is necessary in order to apply any changes made to the model to the database itself.
The script can be generated into the Script Executive, to a file or to clipboard. The Script Type options include:
- Create new database
- Update existing database
- Difference script (for testing only)
Specify the file name if saving to file and check/uncheck the options:
- Don't quote identifiers if possible
- Don't analyze IBExpert (IBE$*) objects
- Set generators
- Include object descriptions:
- DESCRIBE statement (IBExpert only)
- UPDATE of system tables
- COMMENT ON statement (Firebird 2.x)
Generation of the update database script includes the processing of generators, triggers, exceptions and procedures. View dependencies are also taken into account when the script is generated.
If you need to specify necessary INIT statements, you will need to use the model prescript (Model Options). Otherwise statements such as SET NAMES, SET SQL DIALECT, CREATE DATABASE will be removed from the resulting CREATE DATABASE script.
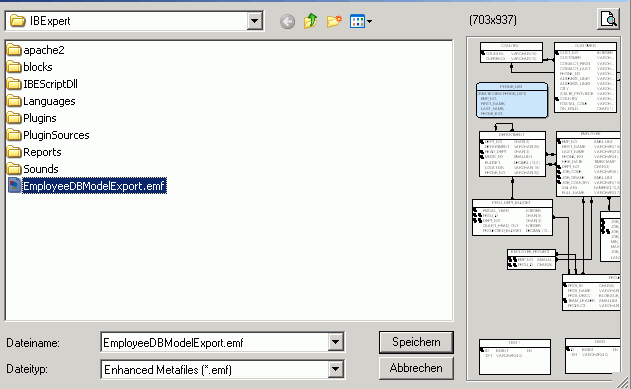
Export
The database model can be exported, either as a bitmap (.bmp) or an enhanced metafile (.emf). Simply load the model to be exported, click the Export menu item, and specify the name and format.
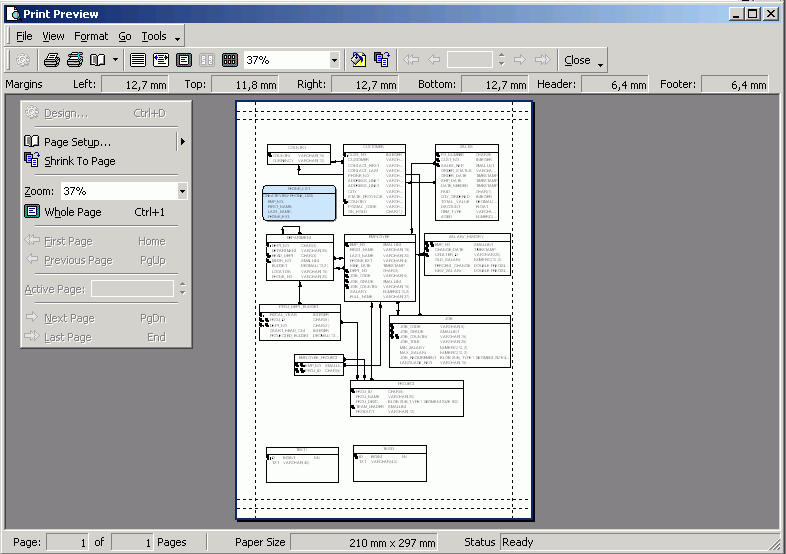
The database model can be printed, using the respective Database Designer menu item or icon. This option firstly produces a print preview, allowing adjustments to be made before printing.
It is possible to store printing options between sessions. You can display borders of pages (printable parts) with dashed lines. You can customize the page options (size, headers and footers etc.) using the Print Preview form:
Manage Subject Areas
The IBExpert Database Designer menu item Manage Subject Areas is particularly useful, for example, to administrate or visualize certain sub-areas of the database, e.g. Sales or Administration, independently or separately from the rest of the database.
Using the two icons at the top of the Subject Areas window, new subjects can be defined by entering a name and checking those tables to be included. You can also alter or delete existing subjects. Alternatively objects can be dragged 'n' dropped from the DB Explorer (Diagrams) page to the subject areas to include them as members of this area. It is also possible to drag objects from the list of objects in the Subject Areas Manager.
Several subject areas can be opened and administrated simultaneously; switch from subject to subject by clicking on the window buttons underneath the main editing area.
Objects can subsequently added to any existing subject areas by selecting the object and using the right-click context-sensitive manu item, Add to subject area.
These subject areas are stored with the main subject area when the diagram is saved to file.
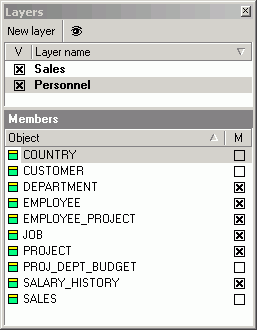
Manage Subject Layers
This filter option allow certain specified tables and their relationships to be viewed. Simply click the New Layer icon, name the layer, and check those objects to be included. In order to view everything again, it is necessary to reopen the Manage Layers dialog, and click the icon Show All.
The diagram created may be saved to file or exported using the respective Designer menu item.
Model Options
The Model Options menu item opens a new window in the lower half of the Database Designer dialog. Here the following visual display and script options may be selected:
When a table or view is double-clicked in the main editing area, an additional window appears automatically in the Model Options window.
- General: Specify the font character set for model objects. Simply click General on the left-hand list, and specify the character set using the drop-down list.
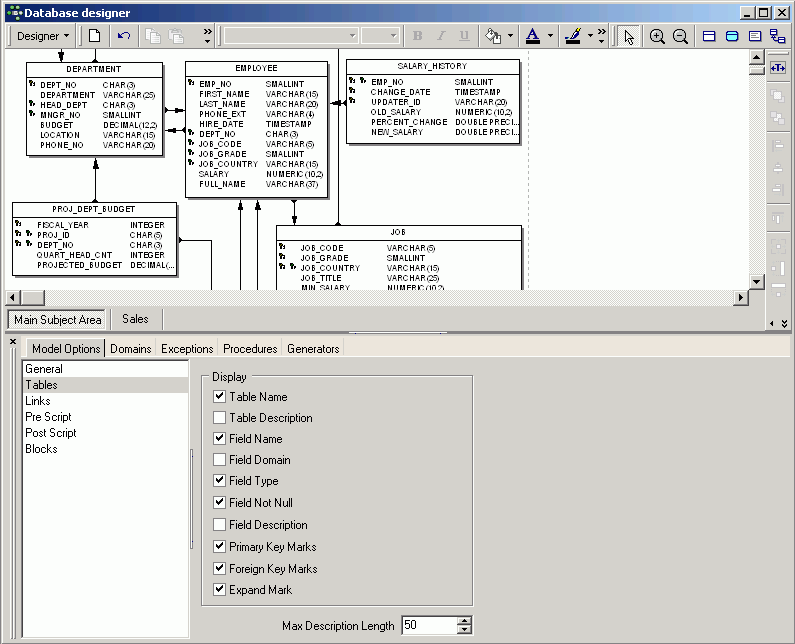
- Table: Options to display the following: Table Name and Description, Field Name, Domain, Type, Not Null and Description, Primary Key and Foreign Key Marks and Expand Marks. It is even possible to specify the maximum description length.
- Links: Display Link Names (i.e. display FK relationships) and Automatically Trace Links (displays the links as horizontal/vertical lines with 90° corners). The following reference notations are supported: IDEF1X, DM, IE. Simply click the Notation drop-down list and select as required. Close the Model Options window, and your model ist notated to the norm specified:
The pre- and postscript options allow you to define pre- and postscripts for your database model. The prescript will be inserted into the model script just after the CREATE DATABASE or CONNECT statement. The postscript will be added to the end of the model script. There is also an added option allowing you to define pre- and postscripts for each table separately.
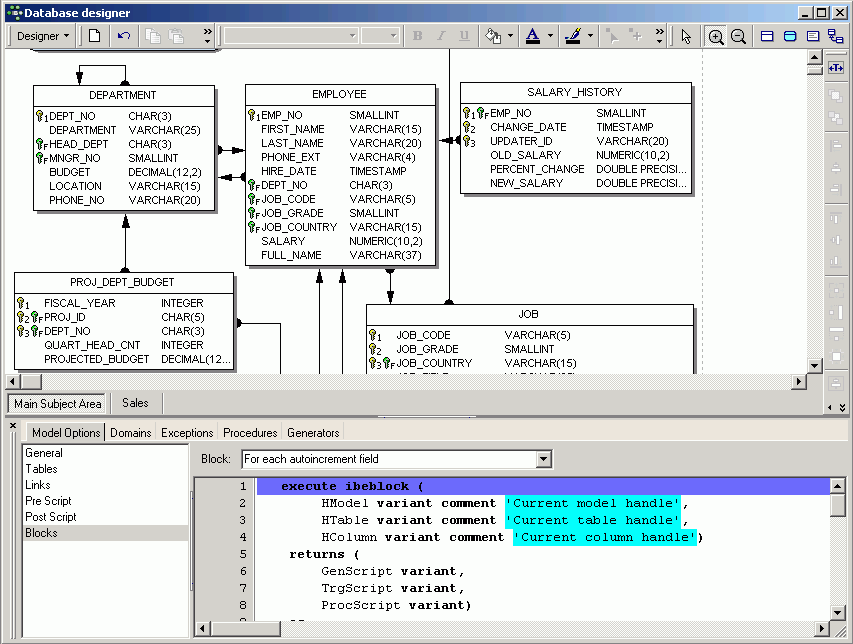
IBExpert also offers support for autoincrement fields based on the IBEBlock feature. To automatically create generators and triggers for autoincrement fields you have to mark the necessary fields as autoincrement and define for each autoincrement field a block (Model Options / Blocks):
    execute ibeblock (
        HModel variant comment 'Current model handle',
        HTable variant comment 'Current table handle',
        HColumn variant comment 'Current column handle')
    returns (
        GenScript variant,
        TrgScript variant,
        ProcScript variant)
    as
    begin
      LF = ibec_CRLF();

      TblName = ibec_dbd_GetObjectProp(HTable, 'NAME');
      FldName = ibec_dbd_GetObjectProp(HColumn, 'NAME');

      GenName = 'GEN_' || TblName || '_' || FldName;
      GenName = ibec_AnsiUpperCase(GenName);

      TrgName = TblName || '_BI';
      TrgName = ibec_AnsiUpperCase(TrgName);

      GenScript = 'CREATE GENERATOR ' || GenName || ';' || LF ||
                  'SET GENERATOR ' || GenName || ' TO 0;' || LF;

      TrgScript = 'CREATE TRIGGER ' || TrgName || ' FOR ' || TblName || LF ||
             'ACTIVE BEFORE INSERT POSITION 0' || LF ||
             'AS' || LF ||
             'BEGIN' || LF ||
             '  IF (NEW.' || FldName || ' IS NULL) THEN' || LF ||
             '    NEW.' || FldName || ' = GEN_ID(' || GenName || ', 1);' || LF ||
             'END^' || LF || LF;
    end
The Model Options window may be closed by clicking the small black x in the top left-hand corner.
Domains
The Model Options includes a Domains page with various insert, alter and delete options, similar to the Domain Editor.
Exceptions
The Exceptions page offers various insert, alter and delete options, similar to the Exception Editor.
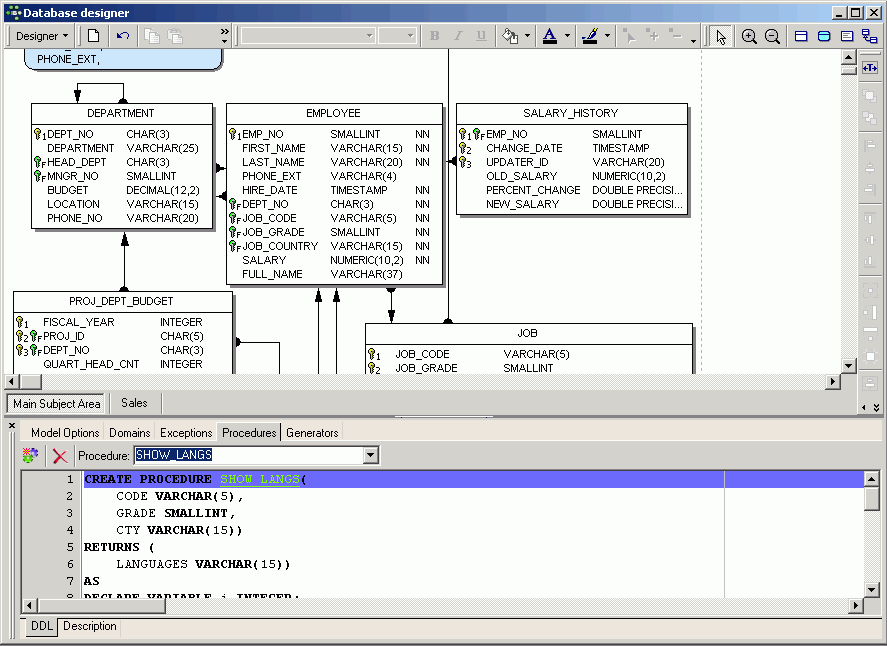
Procedures
The Model Options also includes a Procedures page, similar to the Procedure Editor.
It is possible to insert a new procedure or delete a selected procedure. Existing rocedures can be selected from the pull-down list and the code altered as wished; the editing page offerig all those features included in all IBExpert Edit pages (such as Code Completion, comprehensive right-click menu (SQL Editor Menu) etc).
Generators
The Generators page offers various insert, alter and delete options, similar to the Generator Editor.
Selected Table / Selected View
Table <selected table name>: The options allow columns, indices, keys, checks and triggers to be added, amended or deleted. This version of the IBExpert Table Editor can be used to create a new table or view, or alter an existing selected table. For details please refer to Create Table and Table Editor.
View <selected view name>: A new view can only be created in the Database Designer using SQL. Alternatively create a new view in the DB Explorer, and update an existing diagram using Reverse Engineer.... For further information regarding view creation in the IBExpert DB Explorer, please refer to New View.
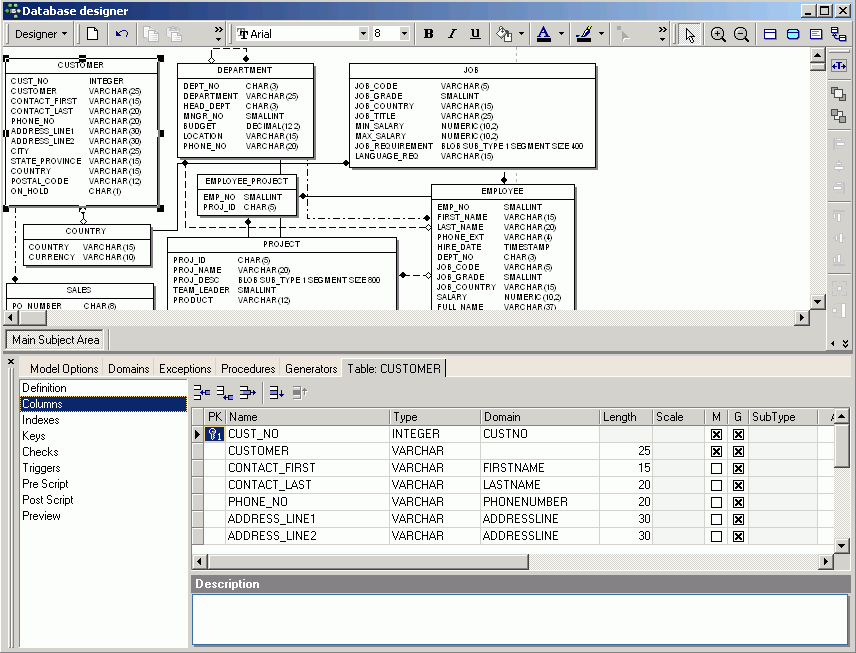
The Definitions page displays the table or view name, allows a description to be displayed/entered and the Generate check option allows the selected table or view to be updated in the diagram.
The Selected Table options: Columns, Indexes, Keys, Checks, Triggers and Preview, and the Selected View options, SQL, Triggers and Preview, are based on those pages found in the Table Editor and View Editor in the DB Explorer. There are however a number of abbreviations included in these frames, which are not included in the DB Explorer editors. These have the following meaning:
- G = generate, i.e. include into the result script.
- U = unique (for indices)
- A = active (for triggers)
- M = mandatory (for columns, i.e. NOT NULL)
Pre- and postscripts can also be defined for each table separately. The prescript will be inserted into the model script just after the CREATE DATABASE or CONNECT statement. The postscript will be added to the end of the model script.
Comment Box
When a Comment Box is inserted into the main diagram, double-clicking upon this box produces a new Comment Box page in the Model Options dialog. This can be used to insert, alter or delete a comment text as wished.
See also:
Database Design
back to top of page
<< Blob Viewer / Editor | IBExpert | Test Data Generator >>


